


")
A broken tile can be detrimental to the look of a home and, if left unattended, may lead to further damage. The good news is that repairing a cracked tile is a manageable DIY project that saves you both time and money.
In this comprehensive guide, we'll take you through the step-by-step process of repairing a cracked tile without the need for a complete replacement.
Materials You'll Need
1. Tile adhesive
2. Grout
3. Putty knife
4. Epoxy filler
5. Fine-grit sandpaper
6. Clean cloth
7. Tile cleaner
8. Painter's tape
9. Small paintbrush
10. Utility knife
Step-by-Step Guide to Fixing Cracked Tiles
Step 1 - Assess the Damage
Before you start the repair process, thoroughly assess the measurement of the damage. If the crack is superficial or hairline, you may only need simple cosmetic fixes. However, for larger cracks, you might need a more robust repair approach.
Step 2 - Clean the Tile
Clean the cracked tile thoroughly to remove any dirt, grime, or debris. Use a tile cleaner and a clean cloth for this purpose. Ensuring a clean surface is essential for proper adhesion during the repair process.
Step 3 - Tape Off Surrounding Tiles
To protect the surrounding tiles from accidental damage, use painter's tape to create a border around the cracked tile. This will help contain any adhesive or filler material and prevent it from spreading onto adjacent tiles.
Step 4 - Remove Grout Around the Cracked Tile
Using a utility knife or a grout saw, carefully remove the grout around the cracked tile. Be gentle and avoid damaging the surrounding tiles. This step is crucial for creating space to work on the damaged tile.
Step 5 - Loosen the Cracked Tile
To remove the cracked tile, gently tap it with a rubber mallet. If the tile is already loose, carefully lift it away from the adhesive. If it's still firmly in place, use a putty knife to pry it up. Be patient and work slowly to avoid breaking the tile further.
Step 6 - Clean the Substrate
Clean the area where the cracked tile was located to remove any remaining adhesive or grout. A smooth, clean surface is essential for proper adhesion during the repair.
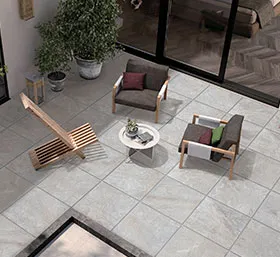
Also Read: Tips For Caring and Maintaining Your Outdoor Tiles
Step 7 - Apply Tile Adhesive
Using a putty knife, apply a thin layer of tile adhesive to the cleaned substrate. Ensure that the adhesive is evenly spread and covers the entire area where the tile will be placed.
Step 8 - Set the Other Tile
Carefully set the replacement tile on the adhesive, aligning it with the surrounding tiles. Press down gently to ensure proper adhesion. Wipe away any excess adhesive with a damp or wet cloth.
Step 9 - Allow the Adhesive to Cure
Follow the manufacturer's instructions for the tile adhesive to allow proper curing time. This is typically at least 24 hours. During this time, avoid putting any weight or stress on the repaired tile.
Step 10 - Grout the Tile
Once the adhesive has cured, mix grout according to the manufacturer's instructions. Use a small paintbrush or a grout float to apply the grout to the spaces between the tiles. Wipe away excess grout with a damp sponge before it dries completely.
Step 11 - Allow Grout to Cure
Let the grout cure for the recommended time, usually around 72 hours. During this period, avoid excessive moisture in the repaired area.
Step 12 - Smooth the Grout Lines
After the grout has cured, use fine-grit sandpaper to smooth the grout lines and create a uniform surface. This step contributes to a polished and finished appearance.
Conclusion
Repairing a cracked tile without replacing it is a DIY task that revitalizes the look of your tiled surfaces. By following these step-by-step instructions, you confidently tackle tile repairs and enjoy a restored aesthetically pleasing result.
Tile & Sanitaryware Manufacturer
Sunwin Ceramic is a renowned manufacturer of tiles and sanitaryware, recognized for its high-quality products & innovative designs. With a strong presence in the industry, we established ourselves as a leading brand, offering a wide range of ceramic & porcelain tiles and sanitaryware solutions.