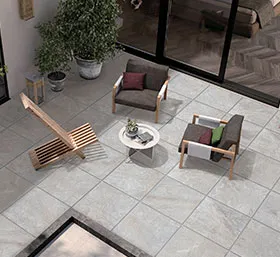

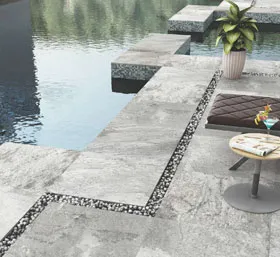


Slab tiles are undoubtedly one of the premier choices to add luxury and seamless functionality to your spaces. Their expansive layout provides the richness of virtual space and eliminates the crowded look even for compact rooms. But it's all possible by following a proper installation procedure. Mistakes during the installation process can lead to potential damage to slab tiles and ruin the overall aesthetic. But what are the common yet important mistakes one can make during the installation of slab tiles?
We will find out the most common mistakes that take place during the installation of slab tiles that can leave a significant impact on your decor. Let's get started.
7 Mistake To Avoid For a Perfect Slab Tile Installation
Installation of slab tiles is a purely technical process having a number of prerequisites. Lack of preparation and unavailability of proper tools can lead to disruption. It is one of the common mistakes that is made during self-installation. Let's have a look at how a lack of preparation can lead to severe damage.
Mistake 1: Not Cleaning The Surface Properly
Problem: If you don’t clean the surface thoroughly before putting up the slab tiles, the adhesive won’t stick and give up after a while. Other stuff on the surface like dust, and dirt needs to be cleaned for the adhesive to work right. This comes up with the problem of slab tiles giving up and making your space look bad in the run.
Prior to the installation of slab tiles, one needs to clean the surface adequately to eliminate dust and debris. Without proper cleaning, the surface remains rough and leads to poor adhesion as the residuals prevent the adhesive from forming a strong bond with the tiles.
Solution: Take a good time to clean the area, before you even start the process of unpacking your slab tiles. Use a mild detergent and cleaning solution to remove any possible material, dirt, grease, or buildup throughout. Don’t ever forget to pay extra attention to the heavy buildup which can cause tiles to give away easily. After a good amount of scrubbing, rinse with water.
Once the surface seems to be perfectly dry and prepped, take a dry cloth and eliminate the remaining residue, or water moisture trapped in the holes. The step may sound easy but you need to achieve optimal adhesion to ensure that your tile is installed and lasts for several years.
Mistake 2: Not Leveling The Surface
Problem: Look at the space, if it isn’t flat, the slab tiles just won’t look right. The crooked or not levelled-up walls will look super bad. The installation will get messy, and result unprofessional look.
Solution: Let’s grab a level and check the surface for unevenness. There is always some kind of spot, bump, or buildup which causes the issue. Pick up the patching compound or filler and start filling them up. Once it is dried completely, you need to start layering your slab tiles to install them on the surface. The small steps make tiles sit nicely and look catchy with their pro-finish, without any gaps or lines between them.
Mistake 3: Poor Planning
Problem: Planning is the most important part, and if you don’t plan, there is nothing but a waste of time, materials, energy, and ample money during slab tile installation. Without a plan, your dreams will break right at your face causing more problems than you had. So, take the time to plan things out properly to avoid these headaches.
Solution: Before you start, it's smart to plan things out. Measure your space carefully and figure out how many tiles you'll need. Think about which way you want the slab tiles to go, how much space you want between them, and any tricky spots on your surface. Draw up a simple plan to help you stay on track as you install the slab tiles. Planning will make the whole process go much smoother.
Mistake 4: Not Assessing The Available Space
Problem: If you don't check the space right, you might end up with slab tiles that don't fit well. They could be too big or too small, making the space look weird. Not sizing things up properly can also make the space feel cramped or too crowded, which won't look good at all. So, be sure to measure carefully to get the right fit and keep things balanced.
Solution: First, measure your area and think about the room's layout. Consider things like how wide the surface is. Then, pick slab tiles that fit well with the size of your space. Make sure they're the right size and shape to keep everything looking nice and balanced when you put them up. You can solve this problem by using tile calculator.
This will calculate the number of tiles required based on your area. Please note, this calculator provides a basic estimate; therefore, manual measurement is still necessary.
Mistake 5: Not Planning The Layout Correctly
Problem: If you don't plan the layout right, you could end up with weird spaces between slab tiles or patterns that don't line up. Not thinking about it can result in you installing tiles that don't match the pattern, or even waste materials. So, take your time and plan carefully according to your space to avoid these problems.
Solution: Before you start putting up slab tiles, make a plan showing where each one will go. Think about how they'll be placed, if any patterns repeat, and how much space is between them. Use tools like measuring tape and guides to keep things accurate. Planning ahead like this helps your space look fabulous, and reduces the chances of making mistakes.
Mistake 6: Not Cutting The Tiles Properly
Problem: If you don't cut the tiles right, they won't fit well. You might end up with edges that don't match, gaps between tiles, or patterns that look off. Messing up the cuts could also mean you waste materials or have to buy more slab tiles to fill in gaps. This will result in both time and money wasted.
Solution: When you're cutting tiles, use the right tools like a tile cutter or wet saw. Measure each cut carefully and use something straight to guide your cuts for nice, clean edges. Go slow and take your time to avoid messing up. Cutting the tiles well makes sure your installation looks seamless in the end.
Tips to avoid improper cutting of tiles:
- Properly mark the cutting area according to the desired sizes and design
- Use tools that are only preferred by the manufacturer's guide for seamless cutting of tiles.
- Go slow and steady for precision cutting and avoid repetition.
Mistake 7: Improper Application of Adhesive
Problem: If you don't use enough or apply adhesive wrong, slab tiles won't stick well. This can cause gaps, air pockets, or even tiles to come loose later on. Messing up the adhesive can also mean uneven coverage or struggling to move slab tiles once it's applied.
Solution: When you're applying adhesive, follow the instructions carefully. Spread it evenly on the back of each tile using a trowel or spreader. Make sure to cover the whole surface with a thin layer—don't go too thick. Press each tile firmly onto the surface, you can use a roller for better result. Let the adhesive dry completely before moving on.
Tips to use the adhesive properly:
- Follow the recommended mixing ratios and instructions provided by the grout manufacturer.
- Mix only the amount of grout that can be applied within the working time specified by the manufacturer.
- Avoid using too much water when mixing the grout, as it can weaken the mixture and affect its consistency.
Some Of The Other Common Mistakes To Consider:
Lack of sealing: Leaves slab tiles vulnerable to stains and damage from moisture.
Poor spacing: Inadequate spacing results in a cramped and crowded appearance of slab tiles.
Uneven tile placement: Failing to ensure a level surface leads to unevenly placed slab tiles.
Inadequate subfloor preparation: Neglected subfloor preparation causes issues like uneven or cracked tiles.
Wrap Up
Installation of slab tiles is the art of proper planning and well-versed execution. It seems to be difficult but actually, it is very simple if you follow the step-by-step guide strictly. Avoid the above common mistakes to ensure a beautiful layer that will partner with you for generations. If you are still struggling with the installation process then don't hesitate to contact us or any other professionals.
Tile & Sanitaryware Manufacturer
Sunwin Ceramic is a renowned manufacturer of tiles and sanitaryware, recognized for its high-quality products & innovative designs. With a strong presence in the industry, we established ourselves as a leading brand, offering a wide range of ceramic & porcelain tiles and sanitaryware solutions.